Wednesday, March 30, 2016

First two days on the job ludtke trucking

This week I started working as a machanic. Here are a few pictures of some things I did the past two days 


Removed the shock on this very rusted trailer. Everything was rusted and nothing went well. Just to get the bolts off it took about 3 hours. Two bolts....
But after learning four different ways to break a rusted bolt we had the shock off of the trailer to show the parts man (ted) so he could order 8 shocks for that trailer.  And all new manual slack adjusters. 


I got ordered to make this tractor start and remove it from the trailer an take it into the shop for further replairs. This tractor is about 50 years old.... It was interesting. Learning how to start it was a learning opportunity all on its self. Then I started taking apart things re did some wiring from the ignition, used the wire brush to clean up the lines to the battery. And after adding some clean new fuel to the tractor and jump packing the battery the tractor fired right up. 
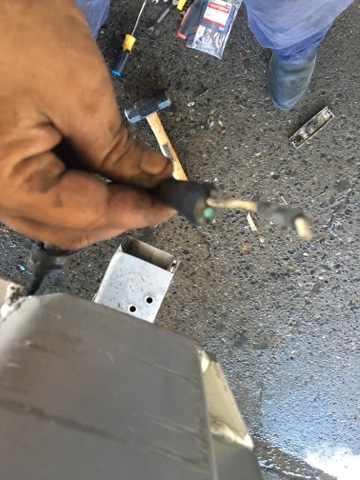
Then I was told to replace some lights on a trailer. I had to red wire it an rewire some stuff and with a new light everything worked well. 


Tuesday, March 22, 2016

Sharpening drill bit

This week I leanred how to sharpen a bad drill bit. Drill bits are expensive so if we can save the bad ones, nothing better. I sharpened a couple bits one with the drill Doctor which I did not like, I prefer sharpening with the stone grinder. By doing this I leanred which way I like to sharpen drill bits, then how to use the drill Doctor and how to sharpen on the stone grinder which took a bit of practice but I got good at it. Here is a picture of my work...

Here is a hole I made with it....


Here is another drill bit I sharpened with the stone grinder...


Here is a hole I did with it....


Tuesday, March 15, 2016

Job box

Today I put up a job box on the international that got the new flat bed. This was challenging. I had never done this before. I leanred different ways to get help from tools to make my job easier. Inpurticular hydronic jacks and a transmission jack because of this Im familiar with the shop and how a tool made for a transmission can help do other jobs as well. Here is a picture...

Then came the challenging part bolting the box on to the frame of the truck. It would had been easier if the job didnt require metel plates that had to be bolted  in the box then out to the frame. Here is a picture to help explain...


Then we had to problem solve because with finding the hole in the frame and trying to line everything up and holding the bolt straight it was hard to keep the metel plate straight. So I used the hydraulic jack to push it into position and tight with the body. Here is a picture.....


Because of this I leanred basically how to problem solve and use the tools around me. And taking the time to plan out what I'm bout to do. Make a plan do the plan. 


Finish product. 


Monday, March 7, 2016

Flat bed rigging, cutting, and grinding

This week I took part in mounting a flat bed onto a truck. The first challenge was rigging the flat bed so it doesn't flex or bend, by doing this I leanred how to use the straps, chains, and spreader bar effectively. It took a bit of trial and error but here is the finished product. 


Next I lowered the bed with wooden blocks under the rails to see if all the mounting plates were ganna clear all the cross member bolts and spring mounts. It turned out we needed to cut four mounting plates. By doing this I leanred how make a cuts with the torch that's not a level surface, it was new to me but it went well. Then i leanred how to effectively use the grinder. Here is a picture that shows one cut I made with the torch...


As you can see there was a cross member bolt in the way, so I made a cut to make the mounting plate fit. Then after I grinded my cut to make it look presentable. 

LINKS HOMEWORK.


Both like are to do with saftey. 


Monday, February 29, 2016

Rocker Box drilling and tapping

This week I inserted helicoils in a rocker box that were stripped out. I used a drilling taping block which I counter bourd to help keep my tap straight. From this I learned how to make sure my inserts go in straight and accuratly. Here is a picture of me doing this 


There were four holes that needed inserts  I did all four the same and they were all successful from this I leanred accuracy and making sure all four bolts screwed down the correct amount. Here is a picture of all four helicoils 


The next thing I did was rig the front end of a kenworth t600. Here is a picture

From this I leanred that using the spreader bar is my favorite way to rig it helps keep everything even and straight. I leanred how to calculate weight approximations of different parts of a truck. 


Micrometer reading and drilling

This week I learned how to read the micrometer. Because of this I was able to messsure objects accurately. I also learned the correct way to old a micrometer so that I have good mobility and looks professional. Here is a picture...


The bottom picture is how I added all the numbers together. From this I leaned how to read the lines on the micrometer, and my reading turned out accurate same as a digital micrometer.

The next project I did was using the drill and magnet I drilled a hole into the frame of truck. Because of this leanred how to use the tool (drill), lining the hole up accurately sitting the magnet so the drill holds up. And then also to Lube the drill pit up as well. Here is a picture...


In this picture the drill is exactly where i want it to make a hole with the magnet grabbing the frame.


You can see the hole that I made in this picture.

Monday, February 15, 2016

Rigging

This week I focused on lifting or some call it rigging. We lifted four items one Detroit 60 series engine, cummins n15, cement block, and forks off of a forklift. Our crane is rated at 6 tons. We practiced rigging to the appropriate weights, by checking safety ratings on the straps and chains. 

This was the first rigging I did. Detroit 60 Series. I learned a lot because it was my first time doing it. I found out how much I should rig for by going to the engine manufacturers website and finding out what ball park the weight of the engine is in. I rigged it for 6 thousand pounds well over the total weight of the engine which was around 35 hundred pounds. Because of this I learned how to adjust the leveler on top so that straps and chain are aligned so that the engine gets picked up straight. We repeated the same thing for the n14 but we added the weight of the transmission. And because of this I learned how to rig so that everything lifts straight up (adjusting the leveler at the top). 


This was simple by doing this I learned how to take measurements length by width to figure out the weight. And then I rigged it for a thousand pounds. Well over the actual weight. 

The next lift I did was very challenging. But I accomplished it by combining all the skills I picked up from past riggings


I used two straps which were rated for over 6 thousand pounds. By doing this I learned how to rig so that both the forks and the back side lift at the same time and go up in level. This took a while for me center the leveler but by doing this I learned to put a wrench on the back of it and level it out. Overall this project was very useful and helped me stay safe.